Wednesday, April 17, 2013

DIY: Make Your Own Ground Beef Using an Old Fashioned Hand Grinder

My Aunt Kathy  makes this amazingly yummy cranberry salad during the holidays. She's made it for decades, I believe. I know when I was little I always looked forward to the white covered dish with the blue square design, because that (usually) meant Cranberry Salad lay hidden within. Sometimes she would put something else in there instead...a crushing disappointment. I remember one time she shared that the secret is using one of those old fashioned hand grinders, not a food processor, because the texture is better...more "rustic" I'd call it. Food processors make everything uniform in shape, this puppy cranks out wonderfully random chunks of texture. I love it!

My husband's grandmother has one, and I borrowed it one year to make Aunt Kathy's Cranberry Salad and never gave it back. Not because I'm a thief though, I'm just forgetful! One day, my mom surprised me and gave me one she picked up at an auction, for something like $2. I couldn't believe it, it was in excellent shape and she only paid a couple of bucks for it. Awesome bargain shopping mom!

I've wanted to try grinding my own hamburger for a while, but a couple of things kept me from it...I wasn't really sure how to do it, I feared it would be a humongous pain to clean the grinder, and flashbacks from years ago when I used an electric meat grinder to grind venison. Blech. I don't want to talk about that. At ALL. 

I wanted to make something with hamburger for supper, and didn't want to go to the butcher shop and spend money. So, I got a chuck roast out of the freezer this morning to thaw. I was blessed to receive a bunch of good quality meat (as in local, grass fed) from a friend who was cleaning out her freezer to make room for the annual meat order she does. I searched online for "how to grind your own hamburger with an old fashioned grinder"...turns out it's pretty straight forward. Cut the meat into chunks, freeze it a bit, then grind it. What was I worried about then? Ok right...

So, here is how you use that cool antique grinder your Great Aunt Tilly left you...

The Players: Antique Grinder, 2# (or so) Grassfed Beef Chuck Roast,
and the ultimate kitchen tool...a VERY sharp Knife!
Cut mostly dethawed meat into chunks. Mine were about an inch square.
If your meat is fresh, cut into chunks and put into the freezer for a bit to
harden them up. Be sure to spread them out so they don't freeze together
into a big clump. They'll also begin freezing sooner if there is space for
air to circulate between the chunks.
I got about eight cups of chunks and a couple nice meaty bones for
broth out of my chuck roast. I'm just guessing at the weight, seemed
like a couple pounds or so by the feel of it.
You'll want to attach your grinder to the edge of your kitchen counter with
the clamp that is on the grinder. If your counter edge is nonexistent, or too big,
you can use the edge of a table. I always put a towel or newspaper underneath the
clamp, because any juices in whatever you grind will leak out as you grind. If
you're doing cranberries, I highly recommend a bucket. Seriously...those guys are
JUICY. And STICKY.  And I should have taken a better picture of this. Sorry!!
Put a few chunks of meat into the hopper. I think I put about five or six chunks in
there. Start turning the handle. One piece of advice, if the handle doesn't want to turn
away from you, check the nut on the front of the grinding plate. If it's too tight, it will
only turn backwards, which of course will not work. Just loosen it up a bit. You'll have
to push down the meat some, I always get horrible visions of my fingers getting
caught in there, but I still use my fingers. You are probably more safety conscious
than I am and would think to use a wooden spoon or something. I thought about
getting the wood thing that goes with my food sieve, but I was too lazy to get it.
Hey, I'm human...what can I say? Anyway, keep adding chunks of meat and
grinding until you get it all ground.
  
I was really pleased with the result. Looks nothing like the stuff you buy
at the grocery store, or even like what I buy at my local butcher shop.
I love my butcher shop, local meats and amazingly friendly service. I'm
going to really, really miss that place when we move!

I couldn't remember if I read you should grind it more than one time or not,
so I ground a tiny bit twice. The piece on the left was ground twice, it looks
less "chunky" than the only-one-time-through piece.

Since I wanted to make hamburgers for supper, I decided to try out
the two different grinds to see which texture I liked better. I made the cutest
itsy bitsy burgers I've ever seen! I seasoned them with salt and pepper
and cooked them. I actually like the coarser ground burger better. It was
amazingly tender, which is what I've read about grinding your own burger.

This is Chloe, "the quicker picker-upper". She is always ready to lend a
tongue in the kitchen and knows right where to station herself when I'm
cooking. She was a big help today with helping me clean up ground beef mess.

This was a bit labor-intensive, but worth the effort. I couldn't believe how tender this meat was! We've been wanting to try the Mythbusters method of tenderizing meat with high explosives, but grinding it ourselves is probably a much more legal and safe way to do it. Some day, though...

I ended up making some really delicious hamburgers for supper and have decided that when I want to make hamburgers, I'm going to grind the meat myself. It was seriously that good! Next time, I will add a bit more seasoning. The test burgers were terrific, and I didn't think they needed anything but salt and pepper. The full sized burgers needed a bit more salt...but I've been over-salting stuff lately so I didn't want to overdo it. Easier to add salt than take it out!

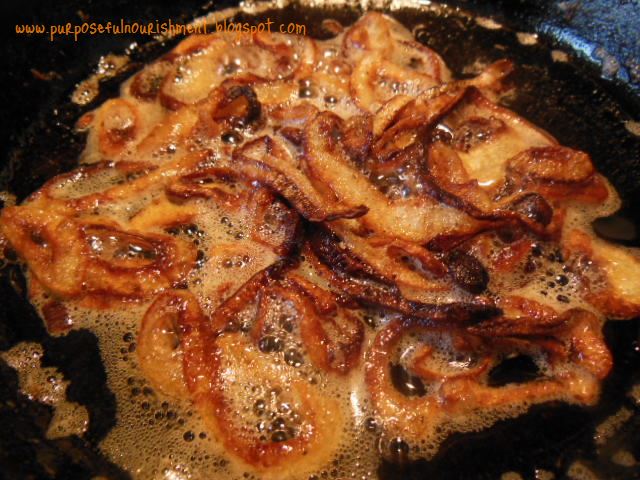
Check out my delicious Home Ground Hamburgers with Caramelized Onions here...and have fun grinding stuff! I'd love to hear about your own grinder stories (where did you get yours? What do you use it for?) and recipes so please comment below!


Home Ground Hamburgers with Carmelized Onions


After making my own ground beef from a grassfed beef chuck roast yesterday, I could only do one thing...make hamburgers for supper! There's lots of fancy ways to make burgers, but I opted for simple. Salt and pepper were the only seasonings this flavorful meat needed, although I should have used more salt. But, other than that they were delicious, juicy and tender. Grinding your own beef really results in a more tender burger. Not sure how, but it does. Check out how to grind your own hamburger on my DIY post: Make Your Own Ground Beef Using an Old Fashioned Grinder. 

I topped mine off with cheddar cheese, freshly sliced off the block and caramelized onions, hubby got Swiss cheese, and picky 12 year old daughter got mozzarella. Mister's got cheddar too.  I'm typing this the next morning, and I would love to have a cheeseburger for breakfast right now. They were that good!

Caramelized onions...those are something I am trying to master and I get varying results. One thing I can tell you is that they can go from caramelized to carbonized in the blink of an eye. They are not really something you should try to make while you're doing something else, especially if you have a tendency to be distractible. Not that I don't try to prove that wrong. I should think about making them before whatever I'm going to put them on, but what usually happens is I get some idea for [______] with Caramelized Onions and start making everything. I wonder if I could make a bunch and freeze them in small portions. I think I'll try that.

I cut out an article in the paper years ago about making caramelized onions and it takes forever to do it right. One of these days I'm going to follow those directions instead of doing it my way, I have a feeling they'll turn out better.  Or, I'll try making them in my crock pot, following the recipe I found at food.com, Crockpot Caramelized Onions.  Definitely look through the comments, there's some good tips there. 

How I Make Caramelized Onions, and Sometimes Carbonized...

This is one of those "recipes" that is not really a recipe...I cut up some onion (I prefer Vidalia), melt some butter in a hot cast iron skillet, dump in the onions, salt them a bit, and let them cook slowly. Or try to. Seems like I always end up with the pan too hot. But anyway, stir them around to get them coated in the butter, and stir occasionally. When they start to turn brownish, you have to really pay attention...stir often, and don't walk away from the stove!

Add sliced, sweet onions to a hot cast iron skillet with melted butter.
This was one small onion and 2-3 Tbs butter and a sprinkling of salt.


After several minutes of cooking, they are already starting to brown
a bit. 

And, before you know it...they're getting overdone...sigh...
And now for the burgers...freshly ground, pattied and seasoned
with salt and pepper.

This is how I have to cook our burgers. Cook mine and the kids
first, flip, then add my husband's. He likes his still mooing. YUK.


I drizzled balsamic reduction over my burger, and enjoyed a simple
kale salad with green peppers, onions and homemade ranch dressing
along with it. Oh, and some Mediterranean seasoned potato chips.
Yummy!
Grinding your own hamburger may or may not be more economical. Our local butcher sells ground beef for $3.89 a pound right now, a chuck roast is $4.39. But honestly, I loved the beef I ground myself so much I think I just might be willing to pay a little more and do the work myself, at least if I'm going to make hamburgers. If it's going into chili or some other kind of ground beef dish, I'd stick with the pre-ground hamburger. A big, juicy, delicious hamburger really showcases the tenderness of home ground beef. 

What are your favorite ways to prepare burgers? Have you ever ground your own beef? What's your favorite way to use caramelized onions?

Monday, April 15, 2013

Gluten Free: Chicken, Bacon and Ranch Pizza

Be sure to enter my Giveaway to win a
FREE bag of CC Dolch Gluten Free All Purpose Flour!
See the bottom of this post for more info...

Supper tonight was Chicken, (Turkey) Bacon and Ranch Pizza, and I used the C. C. Dolch Gluten Free Flour pizza crust recipe. I really like that pizza crust...it's not 100% like the "real" stuff...there's no way, really, to get that chewy-ness in a gluten crust without the gluten. Just the nature of things. BUT, it's fantastically easy and doesn't have that weird flavor that a lot of GF flours and pizza crust mixes have because they don't put bean flour in there. Some people don't mind it, I guess. But I really don't care for it...weird flavor and weird texture. Boo.

I didn't have any ranch dressing on hand, and was out of mayo, so I went searching for a mayo-less ranch recipe. The one below was a good starting place, but for my tastes I needed to add some stuff to get it to where I liked it. I added vinegar (would have used lemon juice if I had any lemons), more garlic and onion powder, more salt, and a pinch of sugar. Most likely, it just needed a bit of time chilling in the fridge, but as I made it right before making supper, I had to use it as it was. 

Freshly shredded cheese tastes soooo much better, and today I used a combination of mozzarella and cheddar. It's also cheaper by the pound, unless there is a tremendously good sale. I get lazy and forget that sometimes and buy the preshredded stuff. But really, nothing compares to creamy, melty mozzarella that was shredded directly over your pizza. Mmmmm!

So, here's the recipes...there's several: the crust, ranch dressing, and putting it all together. 

Pizza Crust (from the back of the CC Dolch flour bag or here on their website)

ingredients:

  • 1 T. yeast
  • 1 1/2 T. white sugar
  • 1 cup warm water
  • 1 1/2 T. oil
  • 1/8 tsp garlic powder
  • 1/2 tsp salt
  • 1/4 tsp oregano
  • 3 cups sifted gluten-free flour
method:

Preheat oven to 350. Combine yeast, sugar and warm water and let set for 5 minutes. Add oil, garlic powder, salt, oregano and flour. Mix all ingredients and put in a large pizza pan. Bake 10 minutes at 350ยบ. Top with your favourite sauce, topping and cheese. Finish baking until crust is light brown.

Ranch Dressing (on allrecipes.com)


ingredients:

  • 1 c sour cream
  • 1/2 c buttermilk or soured milk (milk + vinegar)
  • 1/2 tsp dried parsley
  • 1/2 tsp dried chives
  • 1/2 tsp garlic powder
  • 1/4 tsp dried dillweed
  • 1/4 tsp onion powder
  • 1/8 tsp salt
  • 18 tsp fresh-ground black pepper
  • 1/2 tsp sugar (optional) 
method:
In a mixing bowl, whisk together all ingredients. Adjust seasonings to taste. 

The Pizza

ingredients:
  • 1 pizza crust, prepared and baked 10 minutes
  • 1/4-1/2 c ranch dressing
  • 1-1 1/2 c chopped, cooked chicken
  • 6-8 slices of turkey bacon, chopped and cooked to desired crispness
  • 1/2 small onion, diced
  • 1-2 c mozzarella cheese, shredded
  • 1-2 c cheddar cheese, shredded
  • 1/4-1/2 tsp garlic powder
method:


Topped with cheese
and ready to bake
After removing pizza crust from oven, spread ranch dressing over the top. Sprinkle cooked chicken, onions and bacon on top. Layer cheddar cheese and mozzarella. Sprinkle garlic powder on top and return to 350 degree oven and bake until crust and cheese are lightly browned, 18-25 minutes depending on your oven.


Mmmm...good AND gluten free!

GIVEAWAY! GIVEAWAY! GIVEAWAY!
I am giving away a 22 oz bag of CC Dolch All Purpose
Gluten Free Flour!
to Enter. Hurry, giveaway ends April 30, 2013!

GIVEAWAY!! Win a Bag of C.C. Dolch Gluten Free Flour!

I've been extolling the wonderfulness of C. C. Dolch Gluten Free All Purpose Flour in my last couple of posts. I even wrote to the company to tell them how much I loved their flour, and that I recommended it on my blog. I received a lovely reply and they even sent me a couple of bags of flour! 

Today, I made a scrumptious Chicken, Bacon and Ranch Pizza and while I was making it I thought, I should share the love! In fact, I was puzzled about why they sent two bags of flour and two brochures...well duh, so I could share! I made this realization after opening one of the bags, so i just have one to share now. They didn't specifically say that's what I should do with it, but I try to be generous when I can. Besides, I know first hand how hard going gluten free can be, especially at first when you've  been a bread and pasta lover all your life. So, I would love to help someone out with this amazingly wonderful flour!

So, up for grabs is one 22 oz package of C. C. Dolch Gluten Free All Purpose Flour, seen modeled here by my Kitchen Assistants...

Sr and Jr Kitchen Assistants showing off the Grand Prize. I don't think Jr would be smiling quite so much if he understood that mommy is giving away that bag of flour!

Complicated giveaway entries on blogs really irritate me, so I'm going to make it really, really simple for you. 

1. Follow my blog and...
2. leave a comment on this post about what you'd like to make with this flour

Be sure to spread the word, too! 

Giveaway ends on April 30th! 
Good Luck!


Thursday, April 11, 2013

Gluten Free Pumpkin Cream Cheese Muffins

***Purposeful Nourishment is now Oh Sweet Mercy! Come check out the new look! Click the link below to go there, and thanks so much for stopping by!***

Oh Sweet Mercy

Breakfast today was very pumpkiny. Pumpkin smoothies and these amazingly delicious Pumpkin Cream Cheese Muffins I found on food.com. The poster of the recipe says they are like Starbucks, but honestly it's been so long since I've had one I can't remember well enough what they taste like to say how true that claim is. You'll just have to make them and decide for yourself. Or, just make them anyway because they are really, really good.

 I used the gluten free all purpose flour from C. C. Dolch that I used to make that amazing cornbread the other night, and was not at all disappointed (other than the batter was rather bitter, but the muffins were not bitter at all after they baked). I'm not sure what made it bitter, I'm just guessing it was the flour since I've made pumpkin muffins before going GF and the batter was never bitter. Yes, I sneak a taste of batter with raw eggs in it. Been doing it all my life. Started off with licking the beaters when I was a kid...you know how that goes...at least if you grew up in the 70's and 80's or before people got all freaked out about raw eggs.

I will definitely make them again, and if I'd thought of it when I was making them I would have added ground flax for the extra nutrition. Please see the chef's notes for tweaks, as I made a few.  They really bake up nice with the C. C. Dolch gluten free flour, I think I've found my "forever (GF) flour"! I am not getting any kickbacks for promoting their flour, I am just really, really happy with it and can heartily recommend it!

(Gluten Free) Pumpkin Cream Cheese Muffins 

ingredients:

  • 1 1/2 c gluten free all purpose flour, I recommend C. C. Dolch's
  • 3/4 tsp xanthan gum, if your flour does not already contain it
  • 1/2 tsp cinnamon
  • 1/2 tsp nutmeg
  • 1/2 tsp ground cloves
  • 2 tsp pumpkin pie spice
  • 1/2 pinch cardamom (optional, but I added it...probably 1/8 tsp)
  • 1/2 tsp sea salt
  • 1/2 tsp baking soda
  • 2 eggs
  • 1 c sucanat, or sweetener of your choice
  • 1 c pumpkin
  • 5/8 c light olive oil
  • 4 ounces cream cheese
  • 2 tsp vanilla, divided...more or less to your taste
  • 2-3 Tb powdered sugar or sweetener of your choice
  • nuts or seeds (such as pecans, walnuts, pumpkin or sunflower) if desired for topping
  • demerara sugar for topping, if desired
method:

In a small bowl, mix cream cheese, powdered sugar and 1/2 tsp vanilla until well combined. Using a piece of wax or parchment paper, form cream cheese mixture into a long log (you'll need 12 slices, one for each muffin). Place in the freezer at least half an hour before starting to mix your muffin batter.

Preheat oven to 350. 


In a medium mixing bowl, sift together gluten free all purpose flour, xanthan gum (if using) and spices. Whisk in salt, baking soda and sugar. In a separate bowl, beat together eggs, oil, pumkin and remaining vanilla. Mix pumpkin mixture and dry ingredients until combined, being sure not to over mix...a few lumps are fine. 

Fill muffin cups half full. Remove cream cheese log from freezer and slice into 12 pieces. Push one piece into the batter in each muffin cup. Top with nuts and sugar, if desired.

Bake for 20-25 minutes, or until a toothpick inserted into the muffin (not the cream cheese center) comes out clean.

Let cool in pans for 5 minutes, then remove to cooling rack to cool completely. Be very careful, the cream cheese filling is very hot.

Chef's Notes:

The original recipe called for white sugar, which I try not to use any more than I have to. And vegetable oil. I would have used coconut oil but just didn't feel like melting it. I also didn't really measure it (5/8 of a cup...yeah), but eyeballed it. I should also note that the measurements above are half of the original recipe as well. The vanilla is also an addition, but if you know me at all you know I put vanilla in everything, especially since I learned how to make my own vanilla that is out of this world good. I didn't have allspice, and since the substitute for that is cinnamon, nutmeg and cloves in equal parts, I just did heaping-ish measurements of those spices. 

Visit the original recipe on food.com and read through the reviews. Some people thought they were too spicy, some not spicy enough. Some added cocoa powder. Even though I "winged" it on the spices, I found it to be nicely spiced but not overpowering the pumpkin. The original recipe said to just use plain cream cheese, but many said it needed sweetening and I knew I would prefer it that way. I think next time I will mix the cream cheese with maple syrup instead of powdered sugar. I love maple, nuts and pumpkin together. 

Be sure to get that cream cheese in the freezer at least half an hour before you're going to need to slice it. I didn't, and didn't want to wait any longer so I just went ahead and cut it and it was very messy. It needs to be fairly solid, but not necessarily like an ice cube.

This could also be made with regular flour. The C. C. Dolch flour is substitutable at a 1:1 ratio so no adjustments in flour measurements should be needed.


Tuesday, April 9, 2013

The Best Cornbread Ever...Seriously!

My husband is not as "into" food as I am. Food is just something you have to have to live, nothing to get excited about, really...at least for him anyway. I'm just the opposite...it's not just something you have to have to live, it's something to experience. Being a very sense-oriented person means that every aspect of a bite of something to eat is experienced...the way it looks, smells, and feels is just as important as how it tastes. 

If my husband says something is "very good", that is akin to receiving a Michelin Star in my book.  I've learned to not get offended if I just get an "it's good" or "it's OK" when I ask him how supper was. It's just not a big deal to him. I've also learned to relish those rare "very good" compliments and strive to get them more often.

This little number below really surprised me because it garnered a "wow this is really good" (a wordier version of the Very Good), which really amazed me because my husband does not particularly like cornbread. I'm not really crazy about it myself, although alongside a hearty bowl of chili or bean soup it's simply amazing, or can be anyway. I've been looking for "the" cornbread recipe and I think I've found it in this Gluten Free Buttermilk Cornbread Muffins recipe from The Baking Beauties, a site I plan to further explore as the tagline reads "gluten free recipes for everyday living."  While I like a good corn muffin, I just didn't feel like washing my muffin pan so I baked it in my lovely cast iron skillet. Mmmmmm. One of these days I'm going to get a cast iron muffin pan...

I loved this cornbread because it was moist, not dry and crumbly, and just had an amazing flavor. I used butter, "homemade" buttermilk (aka emergency buttermilk because I had none on hand...the old vinegar in milk trick), butter, and gluten free all purpose flour by C.C. Dolch Bakery. It contains millet, white rice and tapioca flours, tapioca starch and xanthan gum. I've been very happy with this flour so far.

GLUTEN FREE CORNBREAD MUFFINS (or cornbread, if you feel lazy)

ingredients:

  • 1/2 c butter
  • 2/3 c sugar (or less if you want)
  • 2 eggs
  • 1 c buttermilk
  • 1/2 tsp baking soda
  • 1 c cornmeal
  • 1 c gluten free flour 
  • 1/2 tsp xanthan gum
  • 1/2 tsp salt
method:

  1. Preheat oven to 350 degrees F. Grease muffin pan and set aside.
  2. In a microwave safe bowl, melt butter. Stir in sugar.
  3. Add eggs and stir to combine.
  4. Stir in buttermilk.
  5. Add dry ingredients, and stir until few lumps remain.
  6. Scoop into prepared muffin tin. (or pour into greased, preheated cast iron skillet)
  7. Bake for 20 minutes in preheated oven, or until a toothpick inserted into the center comes out clean. (30-40 minutes if using a skillet or baking dish instead of muffin pan)
  8. Allow to cool in pan for 5 minutes before removing to cooling rack. Best served warm.
chef's notes:

I used my favorite and trusty cast iron skillet in which I put about a tablespoon of beef tallow and put in the oven while it was preheating. It baked for about 35-40 minutes and turned out with a lovely crust, a little brown on top, and ooooh so yummy. The only change I would make is to omit the xanthan gum called for in the recipe because my all purpose flour already contained it. This is one recipe I don't feel the need to tinker with! Although I could see myself adding cheese or chilies or something like that some time, but honestly it's just perfect like it is.


Tuesday, April 2, 2013

Gluten Free Spiced Peach Buckwheat Waffles, Sans Xanthan Gum

Light, fluffy, flavorful and without gluten and xanthan gum!
Our family's favorite waffle recipe
Many gluten free recipes call for xanthan gum...at least the ones that are mimicking their evil gluten-containing twins, like cakes, cookies and breads. Since xanthan gum is derived from corn, that can be an issue for people with corn allergy. I'm considering exploring that possibility here, but just haven't been able to bring myself to that point yet. Going gluten free is challenging as it is, and to eliminate another food that is so helpful in gluten free cooking (cornstarch and tortilla chips!!) is ratcheting it up a notch too high at this moment.

As I rediscovered my love of buckwheat, I began to notice most bread-like things made with it contain xanthan gum. I have a lot on hand, thanks to a friend and a good deal at a local "dented can" grocery store, but if I don't have to use it then I'd rather not. And, since we are Waffle Lovers over here (thanks to my awesome stepson Andrew who got me a waffle maker for a gift) I was trying to find a buckwheat waffle recipe that didn't require the use of xanthan gum.

My mother in law had shared her waffle recipe with me when I got the waffle iron and I thought why not just substitute the all-purpose flour with buckwheat? It has whipped egg whites in it and baking powder so that will make them rise and be fluffy. I tried it and they turned out great, and honestly, I like them better than their evil wheat twins. Like I said, I love buckwheat!

They are a bit more labor intensive since you have to beat the egg whites until moderately stiff, but that only takes a minute or two, and the result is amazing so it's worth it. I also add vanilla, because we love vanilla too, and the aroma while they are cooking is amazing. We also like to have these any time of day, really. I'm planning on experimenting with a "savory" type of waffle for supper time, although we frequently have these waffles and scrambled eggs for "brupper". Breakfast for supper...

Best Ever Waffles (foodnetwork.com)

Ingredients:
  • 1 1/3 c buckwheat flour (any type)
  • 4 tsp baking powder
  • 1/2 tsp salt
  • 2 tsp sucanat (or sugar of your choice)
  • 2 eggs, separated
  • 1/2 c melted butter, coconut oil or olive oil
  • 1 3/4 c milk
  • 2 tsp vanilla, more or less (;
Method:

Plug in your waffle iron to preheat it. Whisk together dry ingredients in a mixing bowl. Whisk together egg yolks, milk and vanilla. Beat egg whites until moderately stiff. Combine milk mixture and flour mixture and blend well (I just use a whisk), mix in melted butter, then fold in egg whites. Cook on well greased waffle iron until done, top as desired. 

We usually use butter and real, yummy maple syrup. We also like fresh blueberries and whipped cream...well, any kind of fruit and whipped cream. Today, I made spiced peaches to put on top, which would have been good with whipped cream...had I thought of it in time to make the whipped cream. I'm not a morning person. I'm also not a DST person. The combination has been especially brutal this year. 

Anyway...the "spiced peaches" was not made as ideally as I'd prefer (fresh peaches and juice) but I do the best I can with what I have. Here's my "recipe"....

Spiced Peaches and Syrup

Ingredients:
  • 1 large can sliced peaches in heavy syrup
  • 1/2 tsp cinnamon
  • 1/2 tsp ginger
  • 1/4 tsp nutmeg
  • 1/4 tsp cloves
  • splash of vanilla
Method:

Drain some of the heavy syrup off the peaches and whisk in the spices until well combined. Add the rest of the peaches and juice and mix well. 

If I had fresh peaches, I would have sliced them and put a little sugar on them to draw out the juice, then proceeded as above. Makes my mouth water to think about it...I absolutely ADORE fresh peaches.
Lightly spiced, no HFCS. Delicious on our waffles!